Enable access to your OCI tenancy
To effectively monitor your Oracle Cloud Infrastructure (OCI) using Site24x7, it's essential to grant appropriate access to your tenancy. This section outlines the steps involved in configuring the necessary permissions.
Prerequisites
- An existing Oracle Cloud tenancy with the required resources.
- Administrator privileges within the Oracle Cloud tenancy.
- A Site24x7 account with the necessary permissions to create and manage integrations.
Creating a policy to enable tenancy access
For OCI monitoring, each compartment will be added as a monitor within Site24x7, and its entities will be monitored. When you add the root compartment, all child compartments will be integrated as separate monitors automatically. However, if you need only certain compartments to be added, you can integrate them manually.
We use cross-tenancy access to monitor your resources using our tenancy user. This ensures your data security as we won't require any credentials from your end.
To monitor your OCI resources, Site24x7 needs access to your tenancy. This requires creating a specific policy to allow Site24x7 to view your resources without affecting your security. To do so, follow the steps given below:
- Log in to the OCI console.
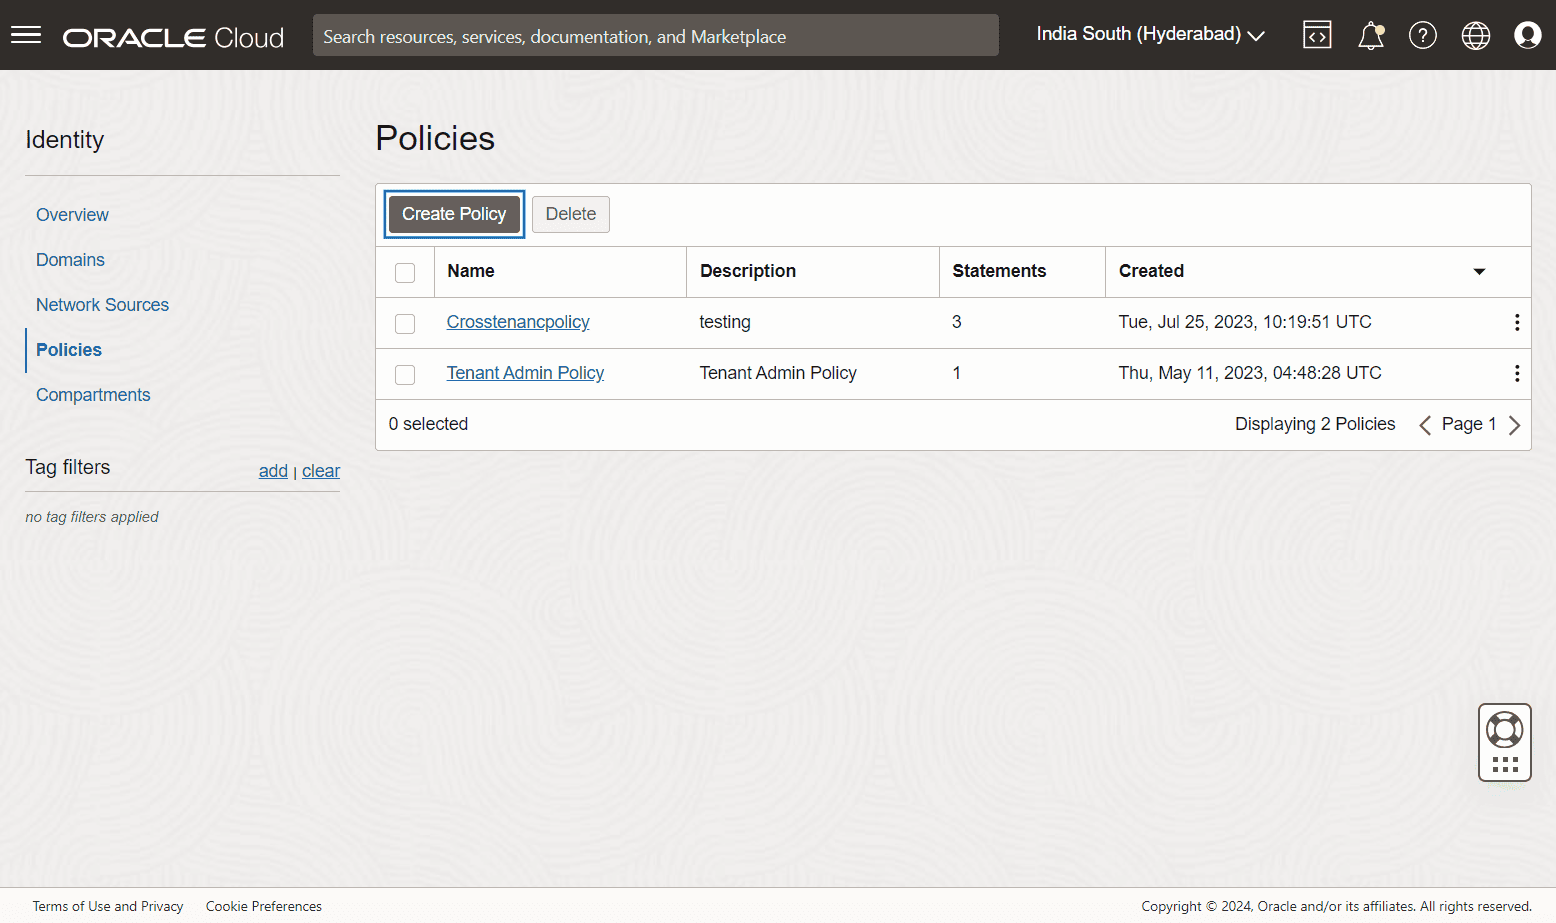
- Under the Identity & security section, go to Identity > Policies and click Create Policy.
- On the Create Policy page, enter the following details:
- Name: Copy the Policy Name provided in Site24x7's Add OCI Monitor page and paste it here as the policy name.
- Description: Enter a policy description.
- Compartment: Select the applicable compartment for which you wish to create the policy.
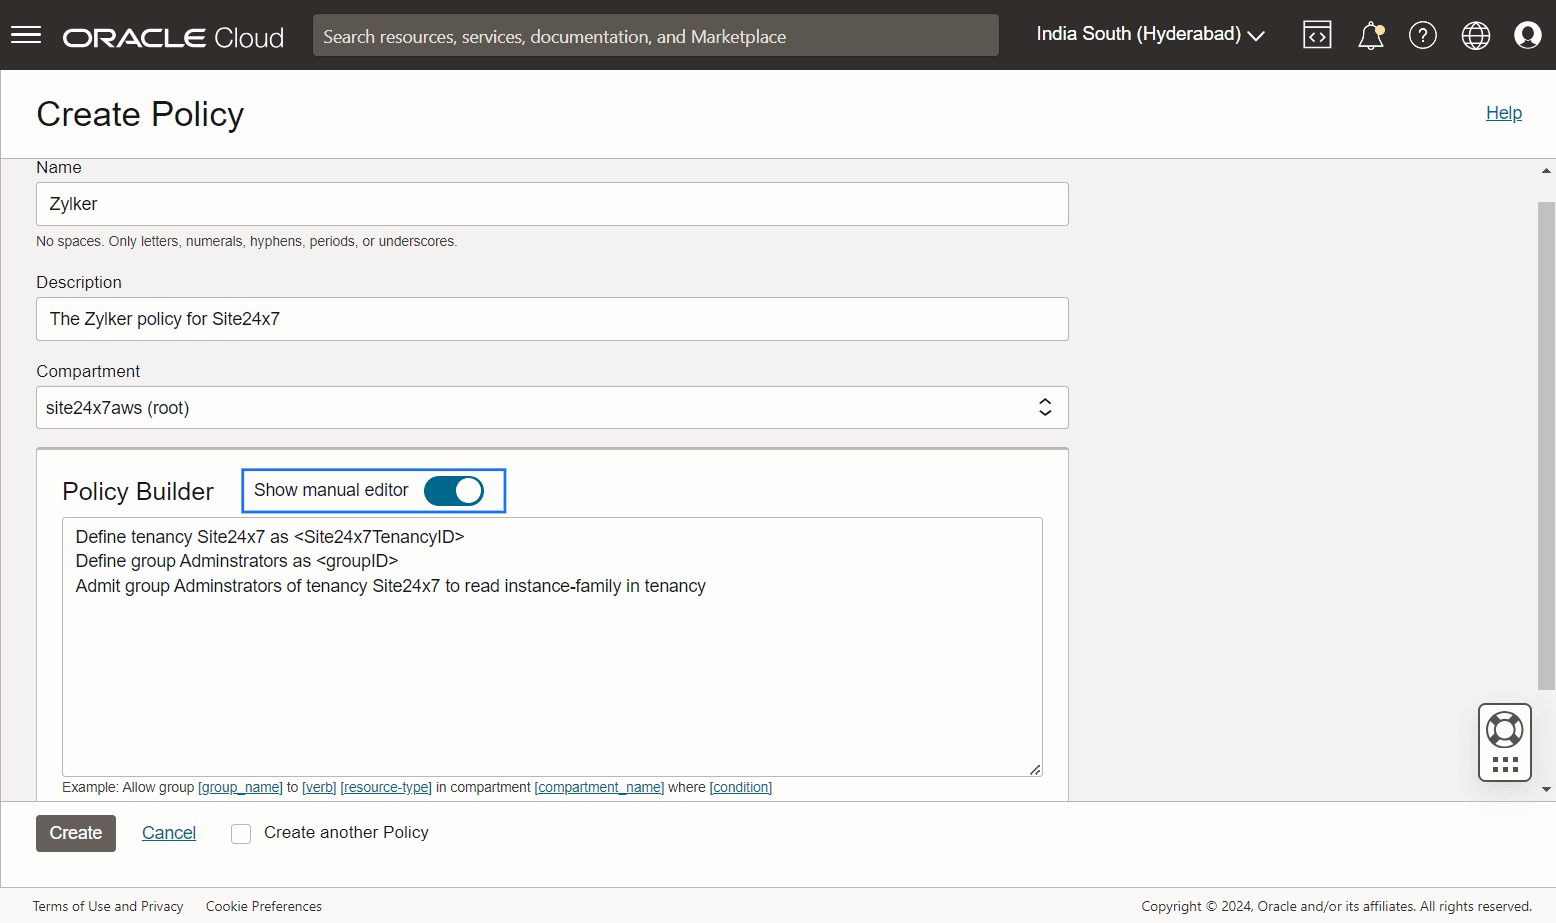
- In the Policy Builder section, enable the Show manual editor option. Copy the Site24x7 Tenancy ID and Group ID from Site24x7's Integrate OCI monitor page and paste it in the below syntax:
- Define tenancy Site24x7 as <Site24x7TenancyID>
- Define group Administrators as <groupID>
- Admit group Administrators of tenancy Site24x7 to read all-resources in tenancy
Note- If you wish to restrict access to a specific resource type, use the following syntax by filling the applicable resource type in the placeholder:
Admit group Administrators of tenancy Site24x7 to read <resource-type> in tenancy
- If you are using the above syntax to restrict access to resource type, you need to provide the below syntax in addition to the above one to enable Site24x7 to read the compartments in a tenancy:
Admit group Administrators of tenancy Site24x7 to read compartments in tenancy
- If you are using the above syntax to restrict access to resource type, you need to provide the below syntax in addition to the above one to enable Site24x7 to read the compartments in a tenancy:
- You can apply a policy to a specific compartment, its parent, or even higher levels in your tenancy hierarchy. For example, a policy attached to a compartment applies only to resources within that compartment, while a policy attached to the root applies to all resources in your tenancy. To obtain compartment-based access, enter the following syntax:
Admit group Administrators of tenancy Site24x7 to read all-resources in compartment <compartment_name>
- If you wish to restrict access to a specific resource type, use the following syntax by filling the applicable resource type in the placeholder:
- Click Create. The policy will be created, and you can view the policy details as shown in the image below.
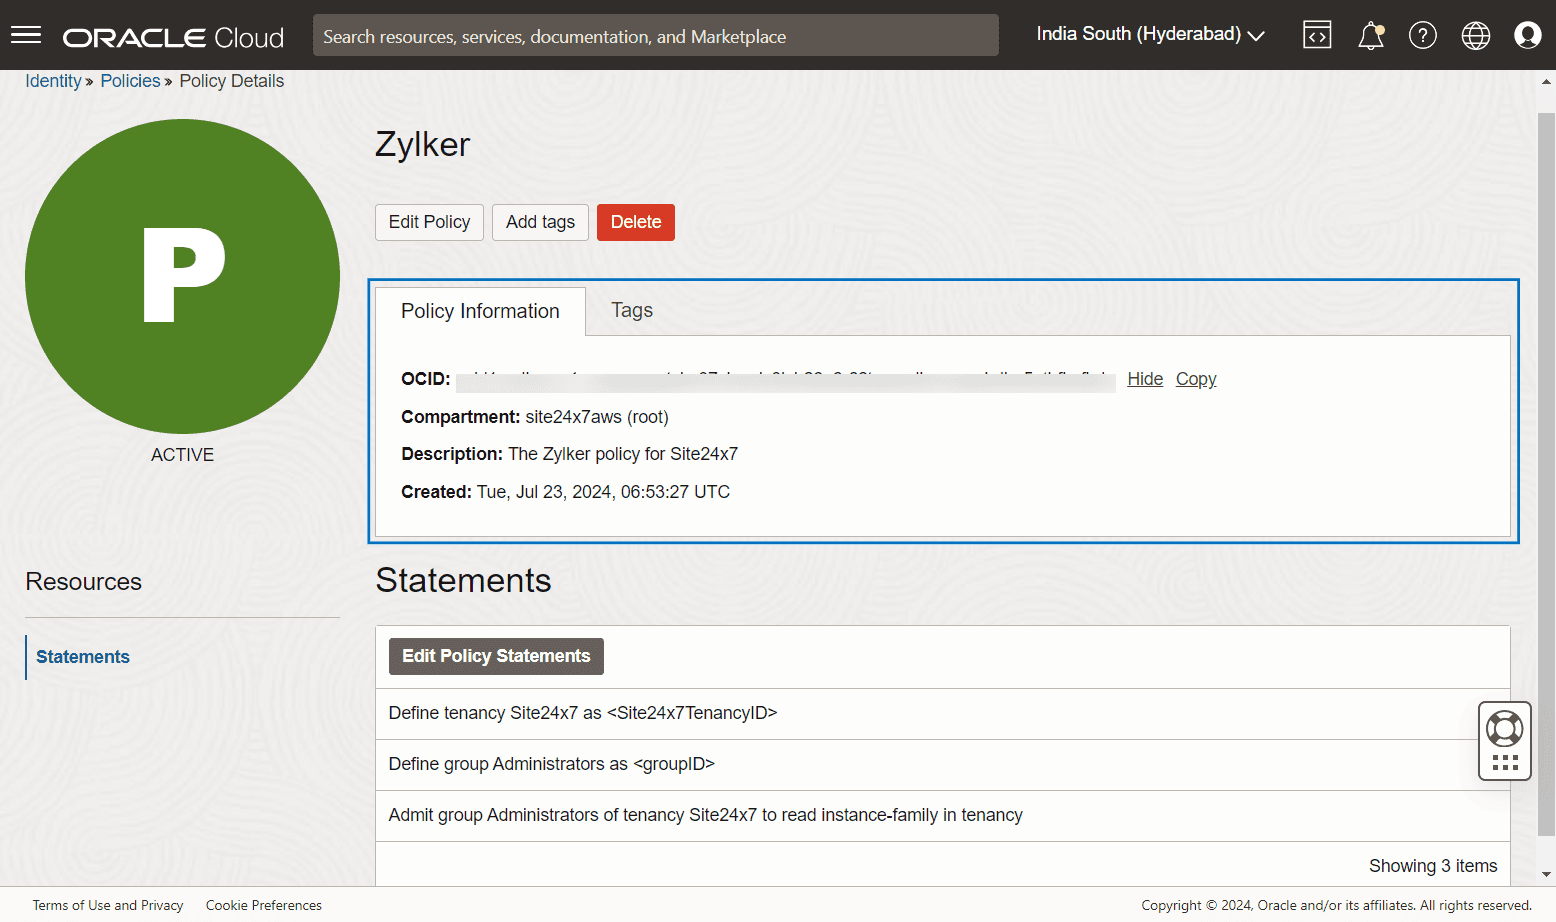
- Copy and save the OCID from the Policy details page to paste it in Site24x7's Integrate OCI Account page.
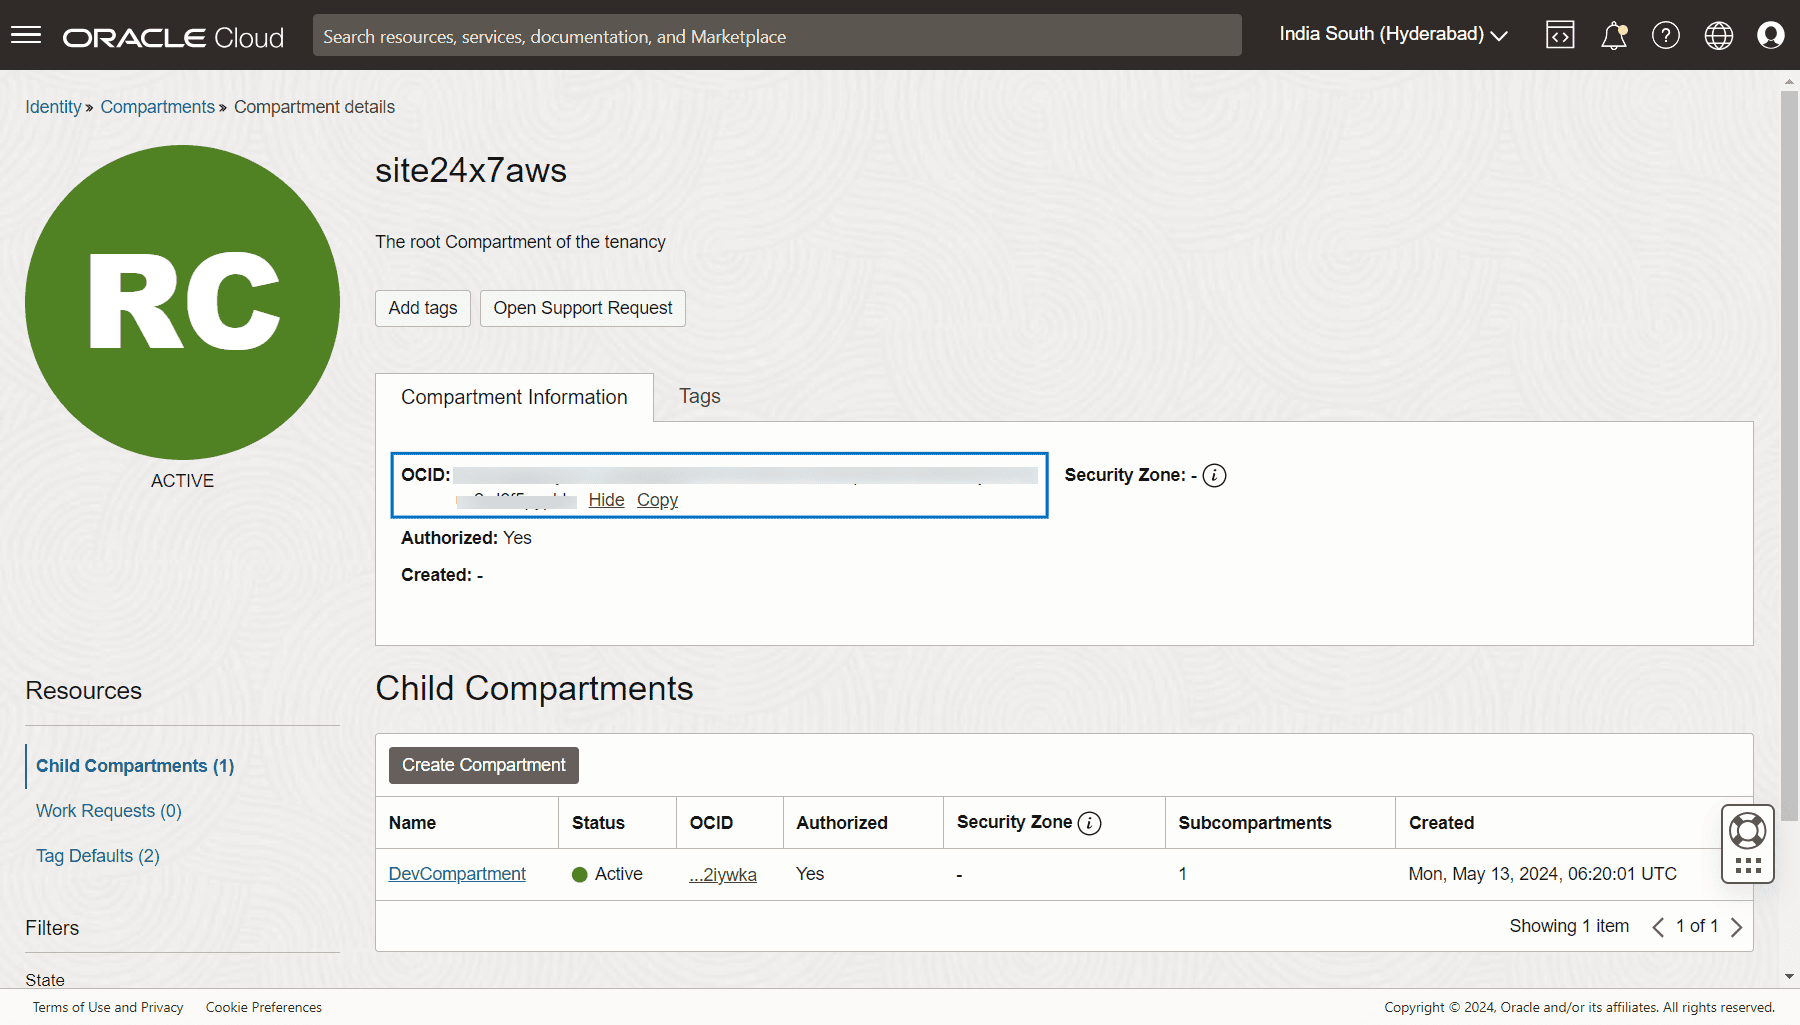
- Go to Identity > Compartments and select the applicable root compartment.
- Click Add Tags and enter the following details:
- Tag namespace: Select the applicable tag namespace. Select None, if you wish to add a free form tag.
- Tag key: Enter the tag key. Copy the tag key that you entered and paste it in Site24x7's Add OCI Monitor > Tag Key field.
- Tag value: Copy the tag value given in the Site24x7's Add OCI Monitor page and paste it here.
- Copy and save the OCID from the Compartment details page to paste it in Site24x7's Integrate OCI Account page.
Editing a policy
To edit a policy for a compartment, follow the steps below:
- Under the Identity & security section, go to Identity > Policies.
- Select the applicable policy to be modified.
- Click Edit Policy to edit the policy description, and click Save to save the changes.
- To edit the policy statement, click Edit Policy Statements and make the applicable changes.
- Click Save Changes.
Deleting a policy
To delete a policy for a compartment, follow the steps below:
- Under the Identity & security section, go to Identity > Policies.
- Select the applicable policy to be deleted.
- Click Delete > Remove.
What next?